In order to serve server request in background there are two ways before ES6.
Using jQuery
- $.ajax();
- $.get();
- $.post();
Using JavaScript:
- XMLHttpRequest
But in both way, there is a limitation while using jQuery based AJAX request or JavaScript AJAX request.
Let us understand why to use JavaScript Fetch API:
Incase of jQuery, we have to include a jQuery file that should be loaded before serving AJAX request which is almost 100kb in file size. Whereas if we use the JavaScript AJAX process, there is more hassle, as developers have to face writing long code for this AJAX request process.
In JavaScript ES 6, a new method Fetch() API introduced. With the help of Fetch() API method we can all things as we were doing AJAX.
With the help of Fetch(), we can do CRUD (Insert, Update, Read, Delete) system with the web server. It is very concise and fast as compared to AJAX.
Fetch() Syntax:
The Fetch() API requires only one parameter which is the URL of the resource you want to fetch.
let response = fetch(url);
Then the fetch() method will return a Promise. In order to handle promise() method we use then() method to show resolve status result and catch() method for showing errors if promise is rejected.
fetch(filename/url)
    .then(response => {
        // handle the response
    })
    .catch(error => {
        // handle the error
    });
Once the request completes, the response will be available. So, now the promise will resolve into a Response object.
Reading the Response
If the response data are in the form of text then use text() method to use response data. If the response data is in JSON format, then use json() method to use response data.
text() or json() methods return a Promise that resolves with the final data of the fetched method.
Fetch() API method works on Live Server.
fetch('file/url').then(function(response){
    return response.data;
}).then(function(result){
    console.log(result);
}).catch(function(error){
    console.log(error);
});
First of all we pass the JSON/text filename path or can use any server side url. This fetch() method returns the promise. And promise() works in two status : Success or Fail. If promise success we use then() function to return response in promise() again and return it again as a final response. This response data can be of Text data or JSON data.
Let us understand with an example-
Create a file with name response_text.txt or any name you want and put some text:
I have added – ‘This is a text file. Testing Purpose.’
<!DOCTYPE html>
<html>
<head>
    <meta charset="UTF-8">
    <title>Advance JavaScript - Fetch() API </title>
</head>
<body>
    <p id="demo"> Here you can see the loaded data.</p>
    <button onClick="loadData()">Click me</button>
    <script>
        function loadData(){
            fetch('response_text.txt')
            .then((response)=>{
                console.log(response.text());
            });
        }
    </script>
</body>
</html>
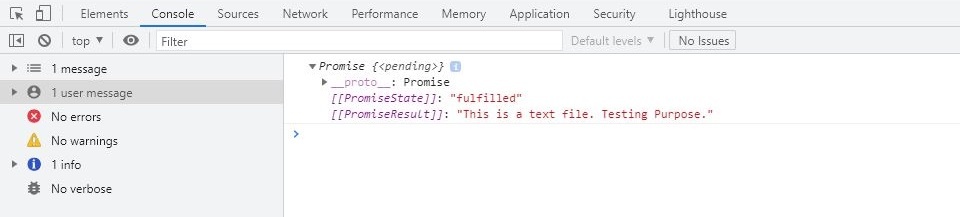
Here in the above example, against the filename path, response will be fetched and will be shown by text(). These all process will be carried out by promise() method.
To get the final data, we need to get result data returned by the promise fulfilled state.
function loadData(){
    fetch('response_text.txt')
    .then((response)=>{
        return response.text();
    })
    .then((result)=>{
        document.write(result);
    });
}


#Output
This is a text file. Testing Purpose.
We can also write more concise syntax to acquire the same result as the above example.
function loadData(){
    fetch('response_text.txt')
    .then((response) => response.text())
    .then((result) => document.write(result))
    .catch((error) => console.log("Can't fetch data!"));
}

#Output
This is a text file. Testing Purpose.
Fetch() – Insert, Update, Delete
In order to Insert, update or delete data on a server, we need to pass:
- method name : (POST/GET/PUT/DELETE)
- body : data (Form Data or JSON Data or Text)
- header : {‘Content-Type’ : ‘application/json’} or sending form data then {‘Content-Type’ : ‘application/x-www-form-urlencoded’}
- POST : POST method is used to add data in the server data.
- PUT : PUT method is used to update some server data.
- GET : GET method is used to read some server data.
- DELTEE: DELETE method is used to delete server data.
Syntax
fetch('filename/URL', {
    method:"POST", //or PUT or DELETE or GET
    body: data, //Form data or JSON data or text
    header: {
        'Content-Type':'application/json', //or if sending form data then 'Content-Type':'application/x-www.form-urlencoded'
    },
});
Fetch() – Insert method
Let’s take some fake data (of jsonplaceholder) which resides on live.
//Insert
var obj = {
    title : 'foo',
    body  : 'bar',
    userID: 1,
};

fetch('https://jsonplaceholder.typicode.com/posts', {
    method:"POST",
    body: JSON.stringify(obj),
    headers: {
        'Content-Type':'application/json; charset=UTF-8',
    },
})
.then((response) => response.json())
.then((json) => console.log(json));
It will add one more row of obj value into posts data. Here, we have taken JSON.stringfy() because of value we are passing to body is JavaScript object that needs to converted into JSON first. So, JSON.stringfy() converts the JavaScript object into JSON data.
We can check the updated data in response. However, it will not be saving on server as it is fake data storage only indented to do testing purpose. But if we do the same thing with our server located data. It is changed permanently.
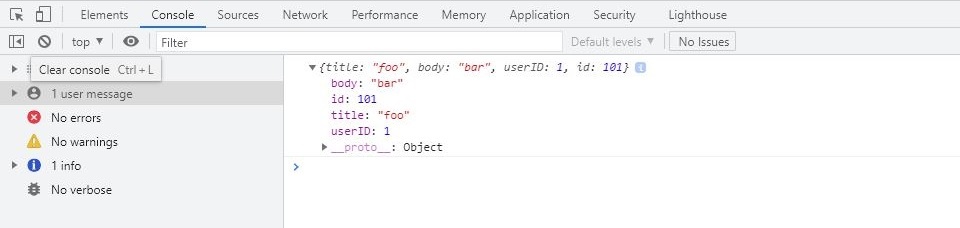
Please have a look on the response we get, it is the last row added to that posts json data.
A fetch api program to add record to existing server record, record should be generated by html form.
<!DOCTYPE html>
<html>
<head>
    <meta charset="UTF-8">
    <title>Advance JavaScript - Fetch() CRUD </title>
</head>
<body>

    <form id"myForm" align="center">
        Title <br>
            <input type="text" id="titleText">
        <br><br>
        Body <br>
            <input type="text" id="bodyText">
        <br><br>
        User ID <br>
            <input type="text" id="userId">
        <br><br>
        <input type="submit" id="saveForm">
    </form>

    <script>
        document.getElementById("saveForm").addEventListener("click", function(e){
            e.preventDefault();
            var obj = {
                title: document.getElementById('titleText').value,
                body: document.getElementById('bodyText').value,
                userId: document.getElementById('userId').value,
            };

            fetch('https://jsonplaceholder.typicode.com/posts', {
                method:"POST",
                body: JSON.stringify(obj),
                headers: {
                    'Content-Type':'application/json; charset=UTF-8',
                },
            })
            .then((response) => response.json())
            .then((json) => console.log(json));
        });
    </script>
</body>
</html>
Let see its output on the browser console:

We can also use formData method to retrieve all inputs value of a form. It is a JavaScript inbuilt feature to get html form data alltogether.
If you are passing form inputs value using formData(), you will have to change headers as:
headers: {
    'Content-type':'application/x-www-form-urlencoded',
},
<!DOCTYPE html>
<html>
<head>
<meta charset="UTF-8">
<title>Advance JavaScript - Fetch() CRUD </title>
</head>
<body>
<form id"myForm" align="center">
Title <br>
<input type="text" id="titleText">
<br><br>
Body <br>
<input type="text" id="bodyText">
<br><br>
User ID <br>
<input type="text" id="userId">
<br><br>
<input type="submit" id="saveForm">
</form>
<script>
document.getElementById("saveForm").addEventListener("click", function(e){
e.preventDefault();
fetch('https://jsonplaceholder.typicode.com/posts', {
method:'POST',
body: new FormData(document.getElementById("myForm")),
headers: {
'Content-type':'application/x-www-form-urlencoded',
},
})
.then((response) => response.json())
.then((json) => console.log(json));
});
</script>
</body>
</html>


